Most homeowners have never had their crawl space encapsulated before. It is not a small job, and it is not a cheap one. So before you schedule anything, it makes sense to want to know: what is actually going to happen, how long will it take, and what will things look like when it is done?
This post walks you through the entire process from the first phone call to the finished product. No sales language, just a straight account of what to expect.
Step 1: The Free Inspection
Before any work is scheduled, we do a free on-site inspection. This is not a formality. It is the most important part of the process.
A crawl space in Bloomington, Indiana is not the same as one in Columbus, Ohio or Charlotte, North Carolina. Southern Indiana has its own soil conditions, seasonal humidity patterns, and rainfall behavior — and older homes in Monroe County often have construction details that affect how moisture moves and where it collects. We need to see what is actually happening under your specific home before we can recommend anything.
During the inspection, we are looking at:
- The condition of the floor and foundation walls
- Signs of standing water, moisture staining, or active leaks
- The state of any existing vapor barrier or insulation
- Evidence of mold, pest activity, or wood damage
- Whether drainage work needs to happen before encapsulation can
You do not need to prepare anything. If you know of past flooding, a persistent musty smell, soft spots in your floors, or any pest history, share that with us. It helps.
At the end of the inspection, you get a clear picture of what your crawl space needs — not a high-pressure pitch, just an honest assessment.
Step 2: The Estimate
After the inspection, we put together a written estimate that lays out exactly what work is involved and what it costs.
Two homes with the same square footage can have very different scopes. A crawl space with good drainage, no mold, and no structural issues will require less prep work than one with years of accumulated moisture damage. We price based on what your crawl space actually needs.
A few things that affect the scope of an encapsulation project:
- Size of the crawl space. More area means more liner, more labor.
- Existing conditions. Debris removal, old insulation removal, or mold treatment may need to happen first.
- Drainage needs. If water is actively entering the space, a sump pump or drainage system has to be addressed before the barrier goes in. Sealing over a moisture problem traps it.
- Add-ons. Insulation, a dehumidifier, or vent sealing may be part of the plan depending on your situation.
If something comes up during the job that changes the scope, we talk to you before we proceed.
Step 3: Before the Crew Arrives
Most encapsulation jobs at Crawlspace Doctor Bloomington take two to four days, depending on size and condition. Before we arrive, there are only a few things you need to do:
- Make sure the crawl space access point is clear and reachable
- Let us know about any parking restrictions at your property
- If you have pets, plan for them to be away from the work area during the job
That is it. We handle everything else.
Step 4: The Work Itself
Here is what actually happens during an encapsulation job.
Day one: Prep and drainage (if needed)
We start with a final walk of the crawl space before any materials go in. If drainage work is part of the plan — a sump pump, interior drainage channel, or similar — that gets done first. You cannot encapsulate over a water problem.
If there is debris, old insulation, or a failing vapor barrier that needs to come out, that happens during this phase too. We haul everything away.
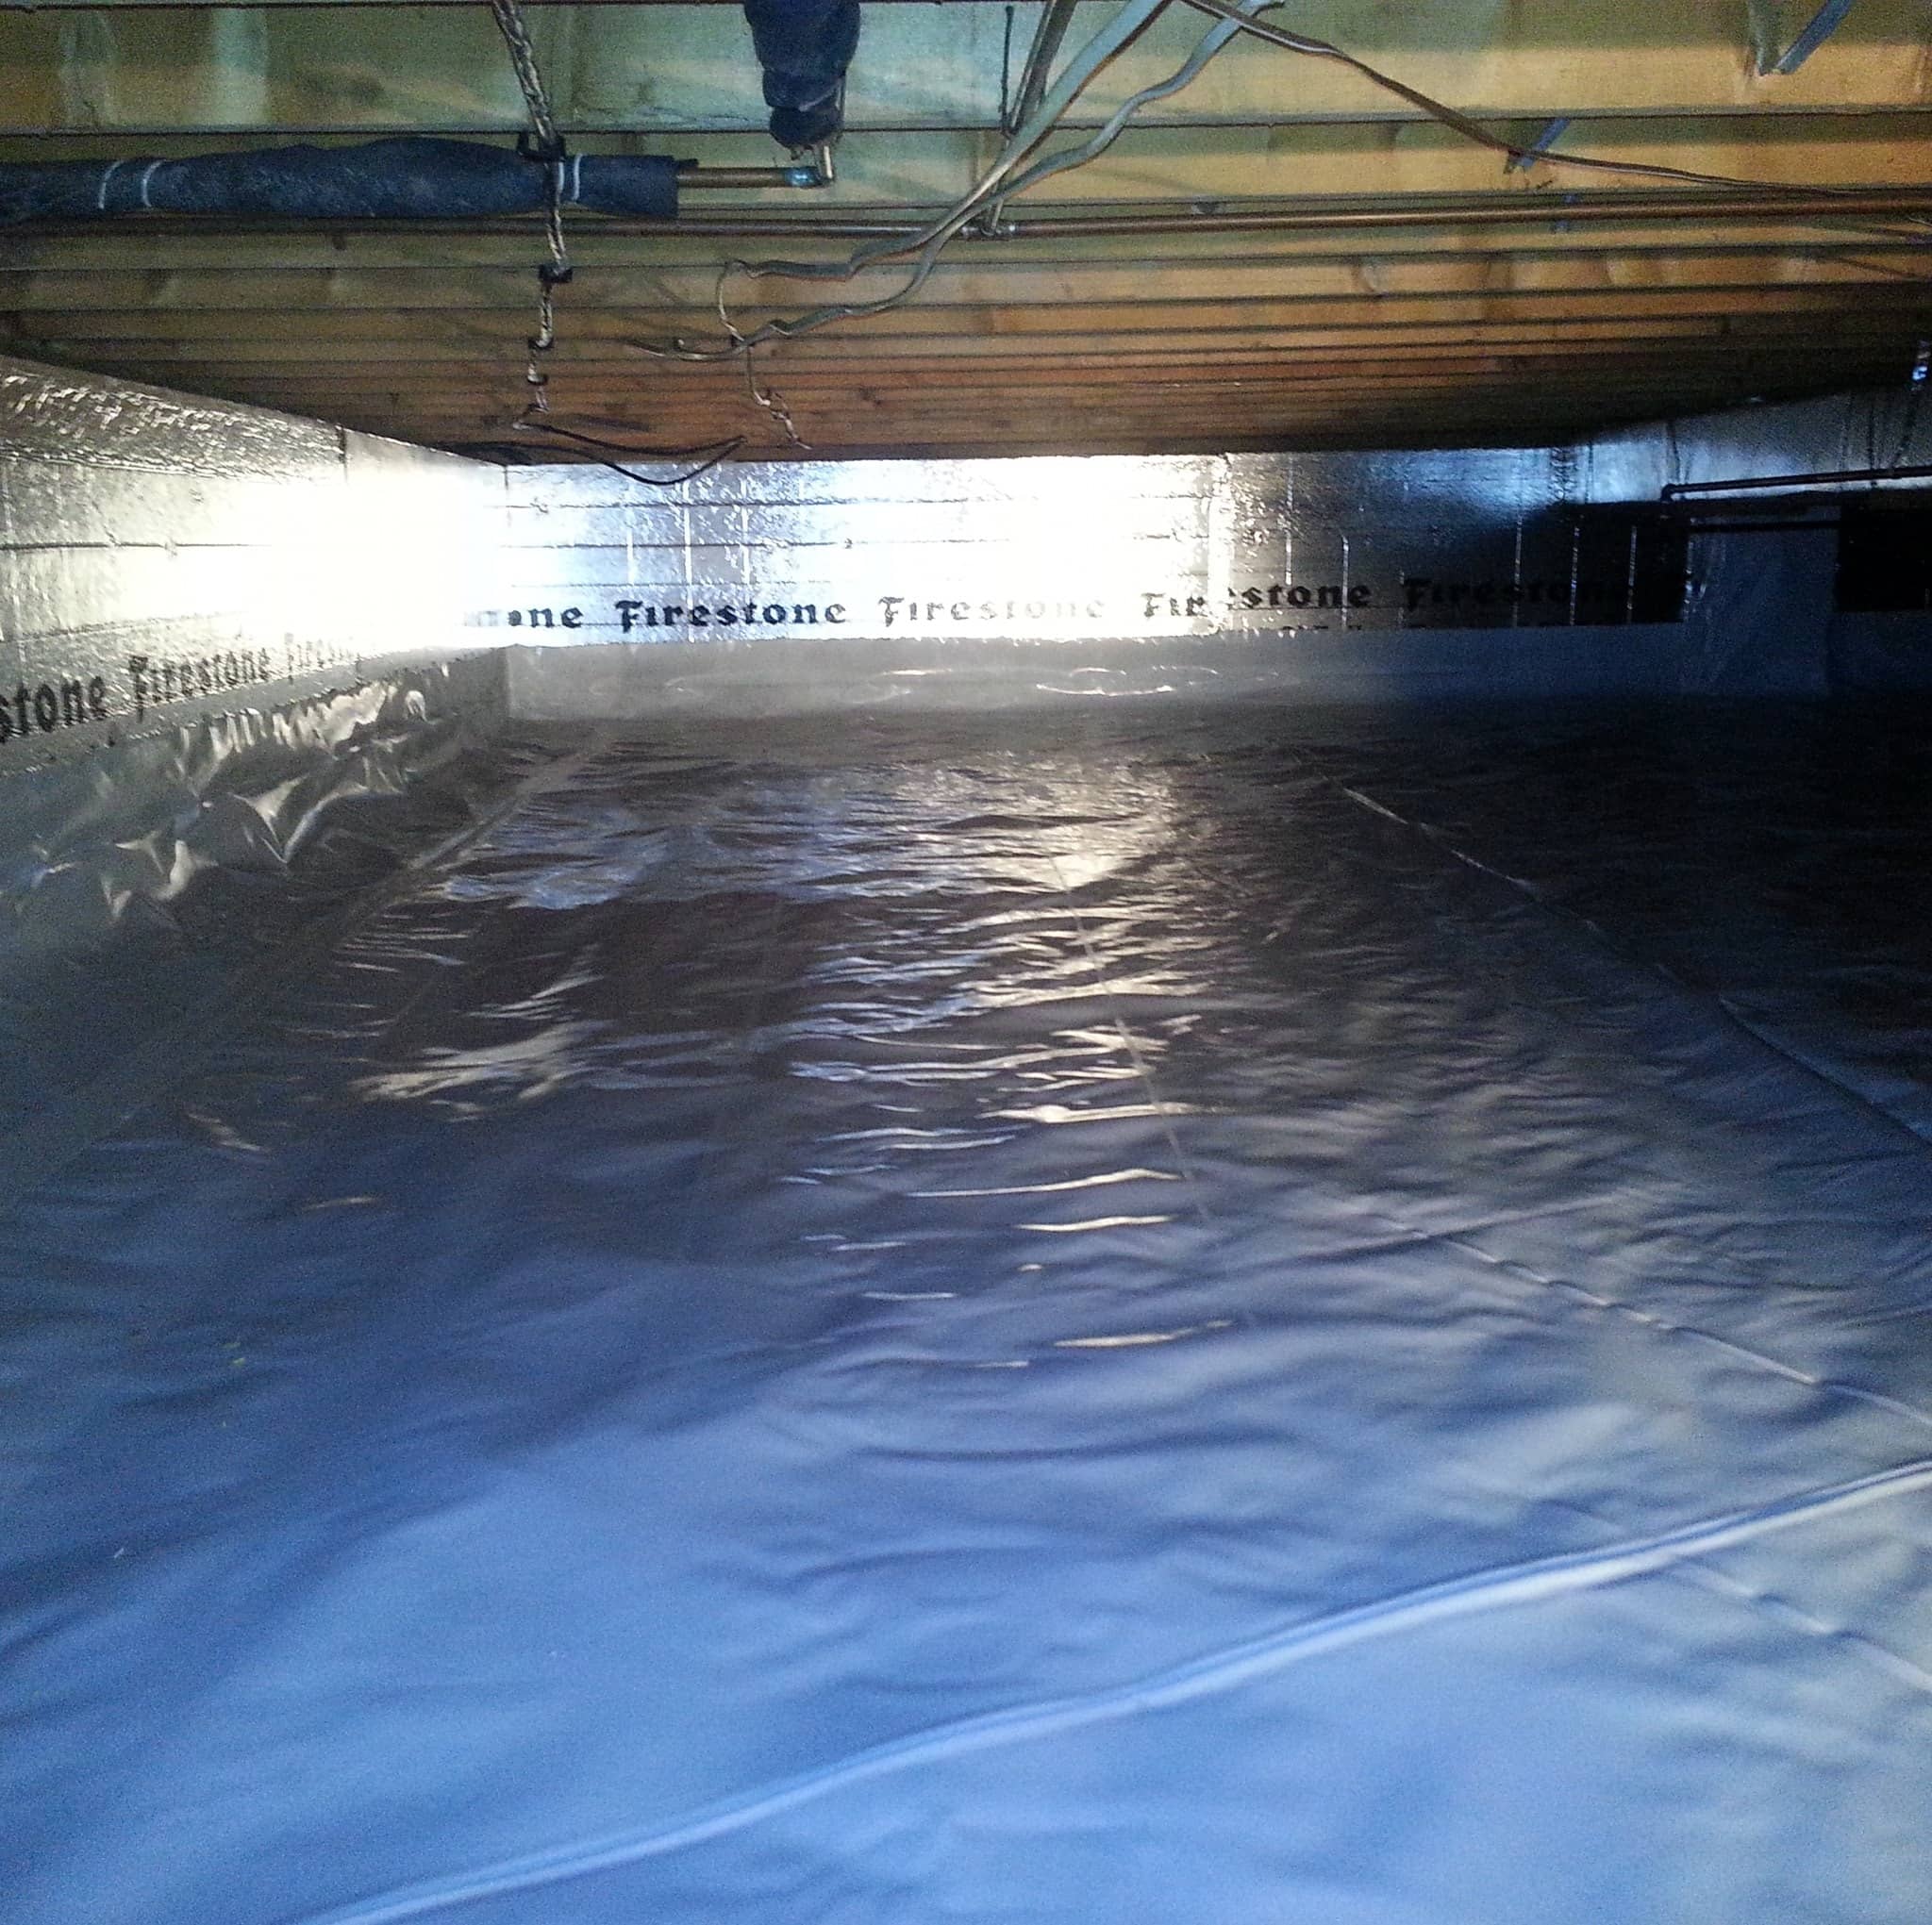
The liner installation
Once the space is clean and dry, we install the vapor barrier. We use a 16-mil reinforced liner — heavier than the industry standard — applied across the entire floor and up all foundation walls. Seams are overlapped and sealed. The liner wraps around piers and posts.
Why 16-mil? Thinner liners are more common because they cost less. They also tear more easily, shift over time, and do not hold up as well when someone needs to access the space later. The heavier material is more durable and more resistant to puncture. It costs a bit more upfront and lasts considerably longer.
Vent sealing and air control
Crawl space vents were once standard practice. The thinking was that outside air would dry out the space. Research — and experience — has shown the opposite is often true, especially in humid climates like ours. Warm, moist outdoor air coming through vents in summer raises humidity rather than lowering it.
Once the liner is in, we seal the vents. The goal is a controlled environment, not a ventilated one.
Insulation and dehumidification
Depending on your situation, we may also install rigid foam insulation on the foundation walls, a commercial-grade dehumidifier, or both. These are not always required, but they make a meaningful difference in energy efficiency and long-term moisture control for homes with ongoing humidity challenges.
Step 5: The Walkthrough
When the job is complete, we walk you through the finished crawl space. You will see before and after photos from inside the space — most homeowners have never seen their crawl space clearly lit, and the difference is usually striking.
We explain what was done, why each component matters, and what to watch for going forward. You get documentation of the work.
Every encapsulation we install comes with a 20-year warranty.
What Changes After Encapsulation
Most homeowners notice a difference within the first few weeks. The most common things people report:
- Musty smells diminish or disappear entirely
- The home feels less humid in summer
- Floors feel more stable and less cold in winter
- The crawl space is now accessible and usable for storage if needed
What to watch for: if you ever notice an unusual smell returning, water around the access door, or significant condensation on pipes, call us. These are not normal and may indicate a drainage issue that developed after the job.
We recommend a visual check of the crawl space once a year, either on your own or with us. We are happy to take a look.
A Note on Timing in Southern Indiana
Spring is when most homeowners discover crawl space problems. Snowmelt and March and April rains put pressure on foundations, and the humidity that follows accelerates moisture damage. By the time you notice a musty smell in May, the conditions have already been working on your crawl space for months.
The best time to schedule encapsulation is late summer or fall — before winter freeze-thaw cycles and ahead of spring rains. That said, if you have an active moisture problem, waiting for a better season is not a good idea. We work year-round.
If you are considering it, the earlier you schedule, the more flexibility you have on timing.
Ready to Get a Look?
If you are not sure what your crawl space looks like or whether it needs attention, start with a free inspection. We will give you an honest assessment with no obligation.
📞 Call us at (812) 322-1615 or:
Crawlspace Doctor Bloomington serves Bloomington, Ellettsville, Bedford, Nashville, Spencer, and the surrounding Southern Indiana communities.